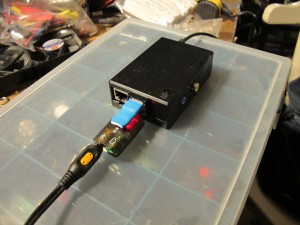
I have just made some progress with something I had been researching for some time. With the rtl-sdr software and the widely available USB DVB-T sticks it is possible to implement a cheap SDR receiver. I wondered whether it is possible to grab the sound output of the rtl_fm low cpu usage receiving utility and convert it into an MP3 stream.
I came across this post on the Raspberry Pi forum and tried to make it work. After some messing around with settings I succeeded. The commands I am using are as follows:
rtl_fm -s 22050 -f 145.575M -l 0 - | lame -b 32 -r -s 22.050 -m m - | ezstream -c /etc/ezstream.xml
Basically, it runs rtl_fm, sends the output the lame mp3 encoder which sends its ouput to the ezstream icecast stream generator. /etc/ezstream.xml is as follows:
<ezstream>
        <url>http://dynode.nl:8000/rpi-rtl_fm-test</url>
        <sourcepassword>xxxxxxxx</sourcepassword>
        <format>MP3</format>
        <filename>stdin</filename>
        <!--
         Important:
         For streaming from standard input, the default for continuous streaming
         is bad. Set <stream_once /> to 1 here to prevent ezstream from spinning
         endlessly when the input stream stops:
        -->
        <stream_once>1</stream_once>
        <!--
         The following settings are used to describe your stream to the server.
         It's up to you to make sure that the bitrate/quality/samplerate/channels
         information matches up with your input stream files.
        -->
        <svrinfoname>RPi rtl_fm test stream</svrinfoname>
        <svrinfourl>www.dynode.nl</svrinfourl>
        <svrinfogenre>hamradio</svrinfogenre>
        <svrinfodescription>RPi rtl_fm test stream</svrinfodescription>
        <svrinfobitrate>32</svrinfobitrate>
        <svrinfoquality>2.0</svrinfoquality>
        <svrinfochannels>1</svrinfochannels>
        <svrinfosamplerate>44100</svrinfosamplerate>
        <!-- Turn off YP directory advertising -->
        <svrinfopublic>0</svrinfopublic>
    </ezstream>
I run a dedicated icecast server on a separate server but it should be possible to host this on the RPi itself. The stream takes up about half of the RPi’s processor capacity. Currently, squelch does not work because it seems rtl_fm stops sending data when the squelch is on, causing lame and ezstream to stop. A possible workaround is to have rtl_fm output to the RPi line-out and generate the icecast stream from the line-in of another USB sound card plugged into the RPi. To solve this in software looks more elegant to me.

